High/Low Door
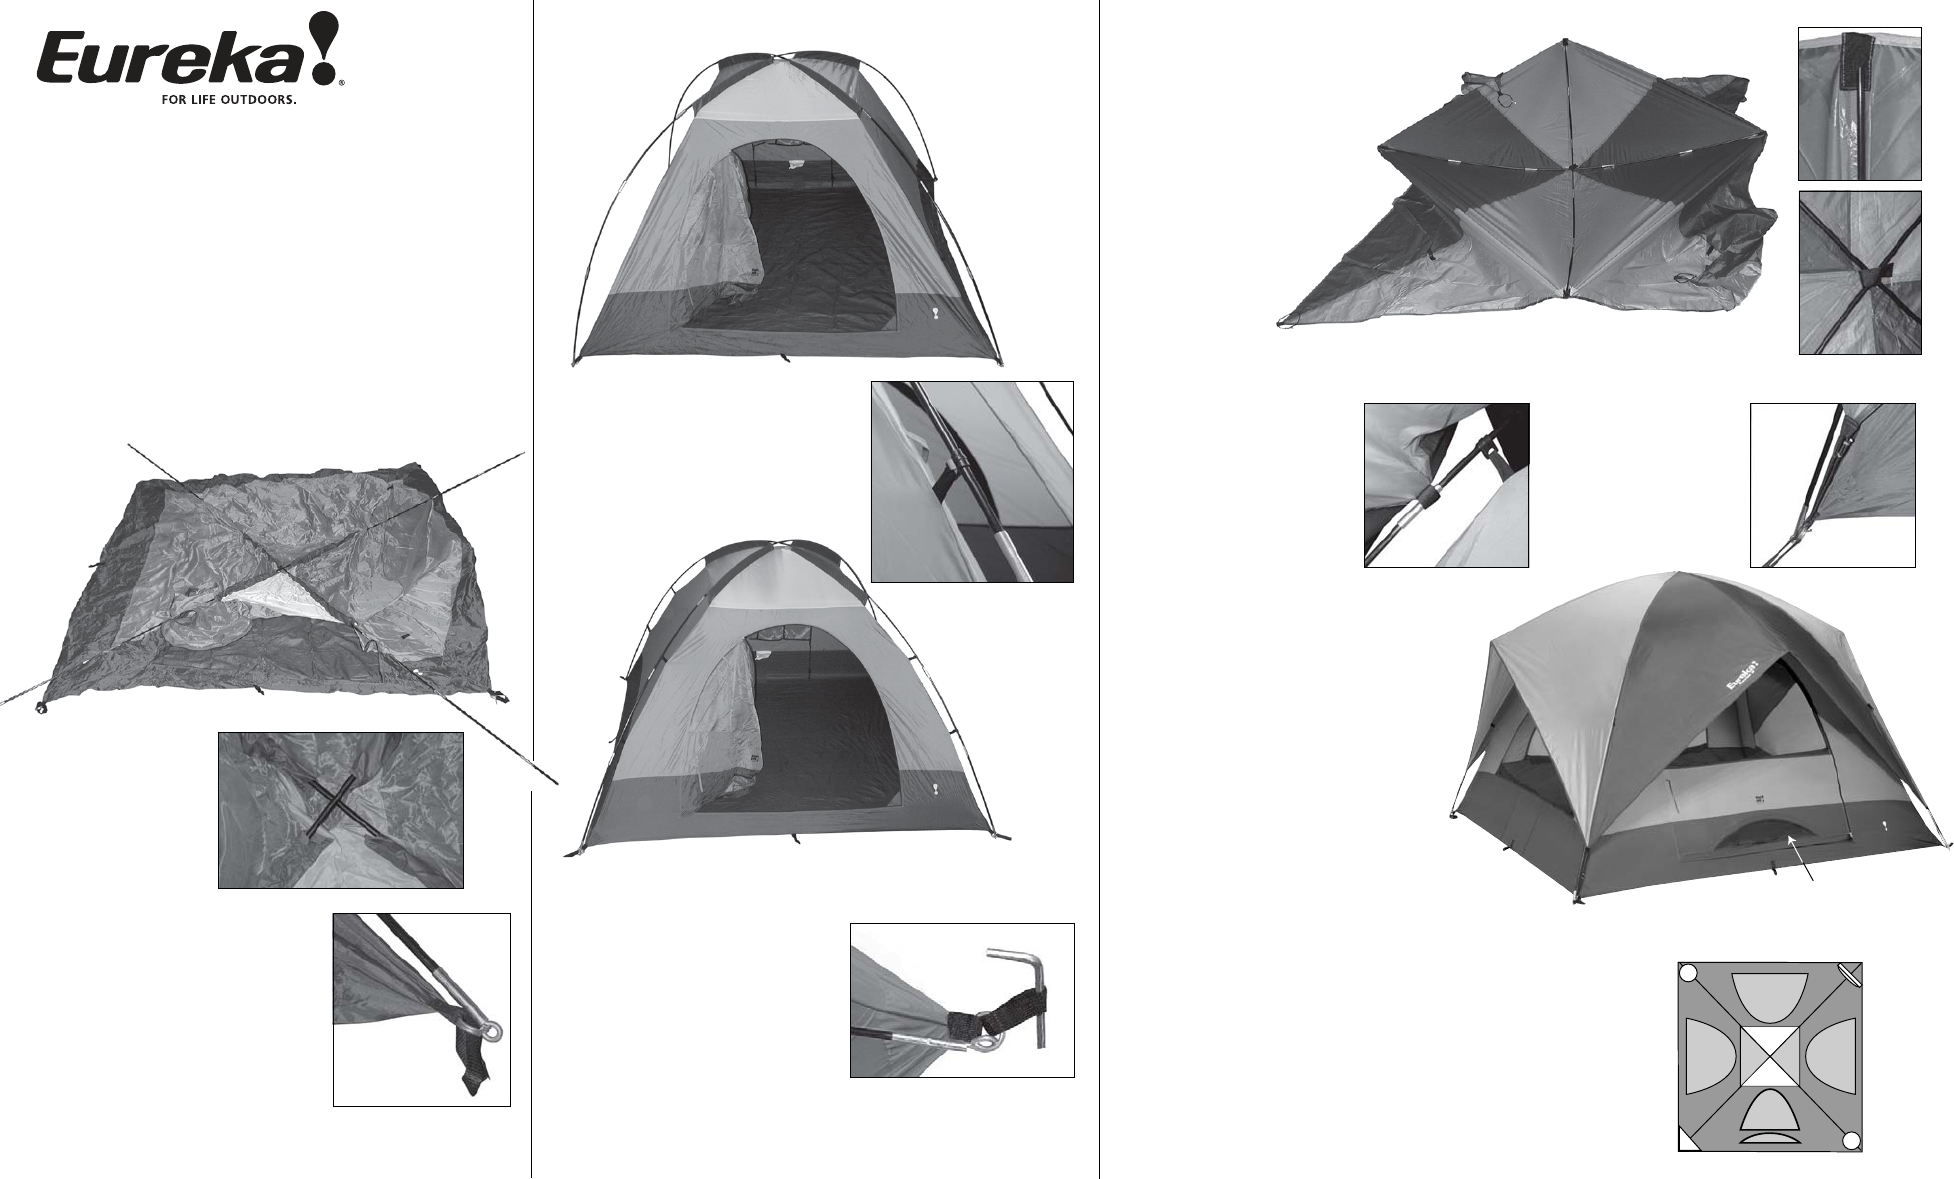
ASSEMBLY INSTRUCTIONS
FOR THE SUNRISE TWO
POLE DOME TENTS
Component List:
1 Tent 2 Tent Poles 1 Carry Bag 1 Rain Fly
2 Fly Rods 1 Pole Bag 1 Gear Loft
4 Mesh Organizers 1 Stake Bag/Stakes
Once the tent is securely staked down,
spread the rain fly out upside down.
Find the web pockets at the
edges. Place the ends of the fly
rods into the pockets. Wrap
the hook and loop fasteners
around the rods to hold it in
place. See Fig. 8, 9 & 10.
Turn the fly right side up and
drape it over the top of the
tent. The Eureka! logo should
be over the front door. Reach
under the fly and wrap the
hook and loop straps around
the poles to secure the fly to
the tent frame. See fig. 11.
Fasten the shock
corded J-hook at
each of the corners
of the fly, to the
rings on corners of
the tent. See fig.12.
NOTE:
Do not drop tent bag or pole bag on its end. Do not bounce
tent bag on its end to get the tent out. These actions may
cut the shock cord and/or damage the pole ends.
REV E 4.09
Unroll and unfold the tent and lay it on the ground. If it’s
windy, stake down one front corner into wind.
Assemble all of the shock corded poles. Keep the pole
sections from snapping together, as this can damage the
pole ends. Make certain each plain end has been properly
seated into the metal ferrule. Lay the poles side by side
and divide according to length. Long for the tent and short
for the fly.
Place a corner pin into the end of
one of the poles.
See fig. 3.
At the opposite end, with the pole in
one hand and a pin & ring in the
other, feed the pole up, bending it
evenly along its length to create an
arc. Make sure the ferrules do not
get caught on the sleeves. Place
the pin into the end of the pole to
maintain tension. Repeat with the
other pole. See fig 4.
The two long poles
cross at the center
through the sleeves
and run corner to
corner. See fig 1 & 2.
fig.2
fig.3
fig.4
fig.8
fig.10
fig.11
fig.9
fig.6
fig.7
fig.1
Start at the bottom and attach all the
clips to the poles to create a
freestanding tent. See fig 5.
Place the tent in the desired location.
Stake the tent down through the
corner web loops. Stake the
opposite corners while applying
tension to smooth the floor wrinkles.
It works best to do this before you
add the fly. See fig 6 & 7.
NOTE: General purpose stakes are
included but snow or sand stakes
can be purchased at a Eureka!
dealer.
fig.12
YOUR TENT IS READY!
NOTE:
In strong winds, tie extra cords
to the storm loops on the fly and stake
down so that the cords are tight.
Take down: Pull up stakes and open doors.
Remove the fly. Pull pins out of the poles. Unclip,
collapse the tent poles and stow in the pole bag.
Fold the tent/fly. Roll up both along with the pole bag
towards the door and stow all in the main bag.
fig.5
Mesh Organizers for small accessories. This
tent is equipped
with hanging mesh pockets for small accessories and water
bottles. Do not keep food in the tent. A hungry animal that
smells food will chew or claw through fabric.
Optional equipment: Floor Saver, placed under the tent,
protects floor and keeps it clean.
Water
Bottle
Pocket
Water
Bottle
Pocket
Corner
Organizer
Wall Hanger
with Mirror


