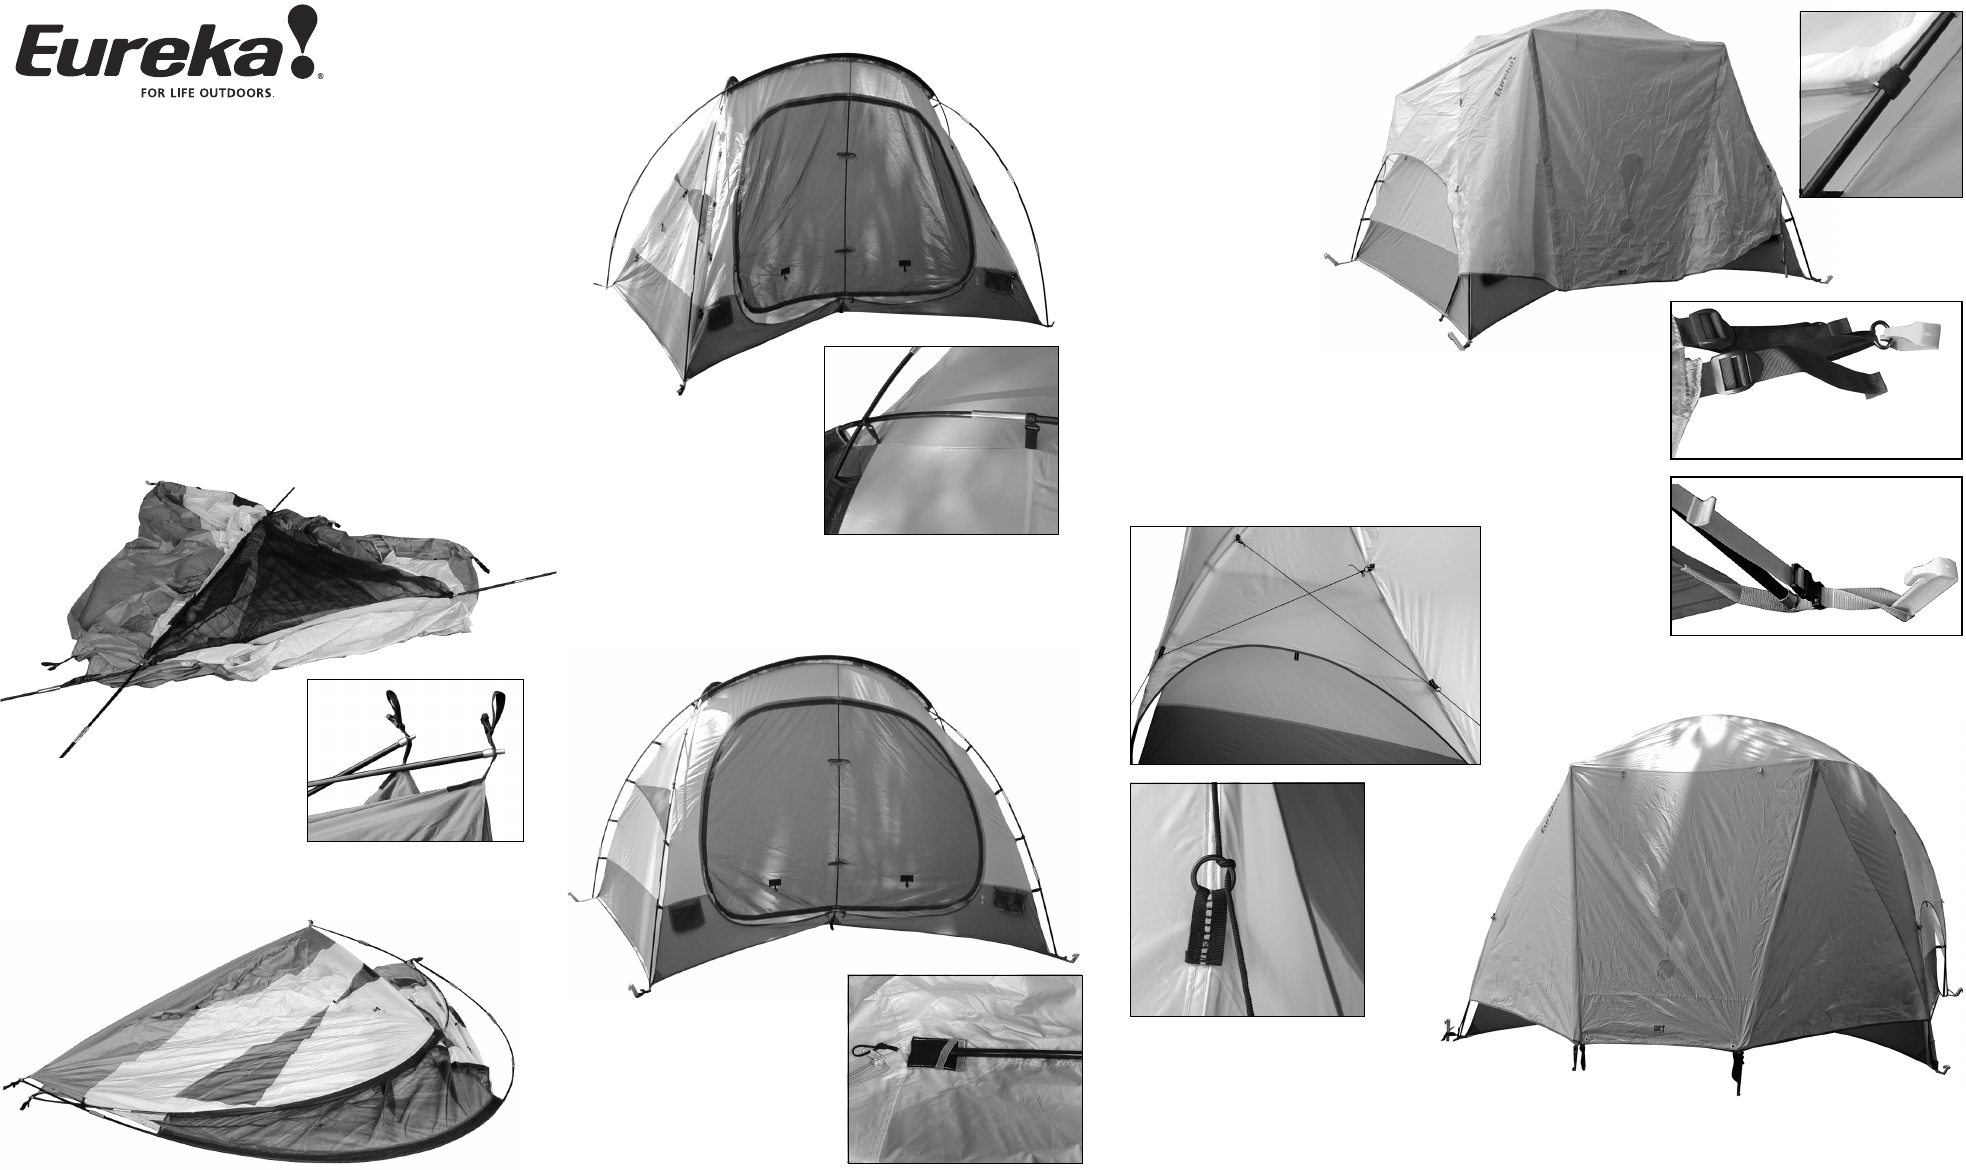
Attach the y to the tent:
• Turn the fly top side up. Start at one end
and drag the fly up and over the top of
the tent [works best with two
people]. It only fits one way; align
the yellow web of the fly to the
yellow web on the tent. See fig.8.
• Reach under the fly and wrap all
the Velcro® straps around the
poles to secure the fly to the
frame. See fig. 9.
Stake down the y:
• There are, web/ring assemblies
on the bottom at each side of the
fly vestibule door. Pull these out and
away from the tent and to stake down.
Adjust as necessary. See fig.10.
• Locate the long web/buckle assemblies on the underside at each corner
of the fly. Attach these buckles to their mates on the corner stake-out
webs and adjust to proper tension. See fig. 11.
fig.9
ASSEMBLY INSTRUCTIONS
FOR THE SUITE 4 and SUITE 6
CAMPING TENTS
fig.6
fig.8
Component List: 1 Tent, 2 Tent Poles, 1 Hoop, 2 Fly Poles, 1 Carry Bag,
1 Pole Bag, 1 Stake Bag w/ Stakes and Guys, 1 Rain Fly, 1 Storage
Basket and 1 Divider Curtain in the Suite 6
NOTE: This is a large family style tent and we recommend that you
have two people for setup.
Do not drop tent bag or pole bag on its end.
Do not bounce tent bag on its end to get the tent out. These actions
may cut the shock cord and/or damage the pole ends.
Raise the tent:
• Unroll and unfold the tent and lay it on the ground. If it’s windy,
stake down one front corner into wind.
• Lay the poles side by side and divide according to length. 2 long for
the tent, 1 long [ with gray section ] Hoop and 2 short for the fly.
• Assemble the shock corded poles as you work. Try to keep the pole
sections from snapping together, as this can damage the ends. Make
certain each plain end has been properly seated into its metal ferrule.
Slide the one tent pole through each sleeve. The poles should run
from corner to corner and cross at the rear of the tent body. See fig 1.
fig.2
fig.1
• Start at the rear of the tent and insert
the post end of the poles into the
web grommets. See fig.2.
• At the opposite end, with the pole in
one hand and the web in the other,
feed the pole up, bending it evenly along its length to create an arc.
Make sure the ferrules do not get caught on the sleeves. Place the
post end into this grommet to maintain tension. Repeat with the
other tent pole. See fig. 3.
fig.3
• Stand the tent up and insert the hoop over the tent poles and
through the front sleeve. Fit a post into the grommet on each
side web. See fig. 4.
Clip the fabric to the frame:
• Working your way around the
tent, attach all the clips to the
poles. See fig. 5.
Add the poles to the y:
• Once the tent is securely staked,
spread the rain fly out, top side
down. Locate the pockets on the
inside of the fly and insert the fly
poles. See fig. 7.
• Wrap the Velcro® strap around the
center of each pole to secure in place.
Stake down sequence:
• The tent is now freestanding. Place it in your desired location and stake
it down through the web loops. First, at the rear of the tent, stake down
the ‘V’. Move to the front and stake down the section between the
doors. Then go back to the rear and stake the corners. Lastly stake the
front corners. It works best to do this before you add the fly. See fig.6.
• We highly recommend that you attach the included guy lines and stake
them out.
Note: The guy lines take a unique path and twist through the second set
of rings. See fig 12 & 13.
Take down:
Pull up stakes and open doors. Remove the fly. Push poles out of the sleeves. Collapse all
poles and stow in the pole bag. Fold the tent/fly. Roll up both along with the pole bag
towards a door. Stow all in the main bag.
fig.10
fig.13
fig.11
fig.12
YOUR TENT IS READY!
Rev A 6.09
fig.4
fig.7
fig.5


