


www.desatech.com
111487-01D
12
INSTALLATION
Continued
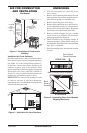
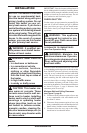
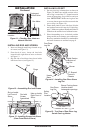
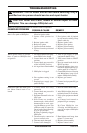
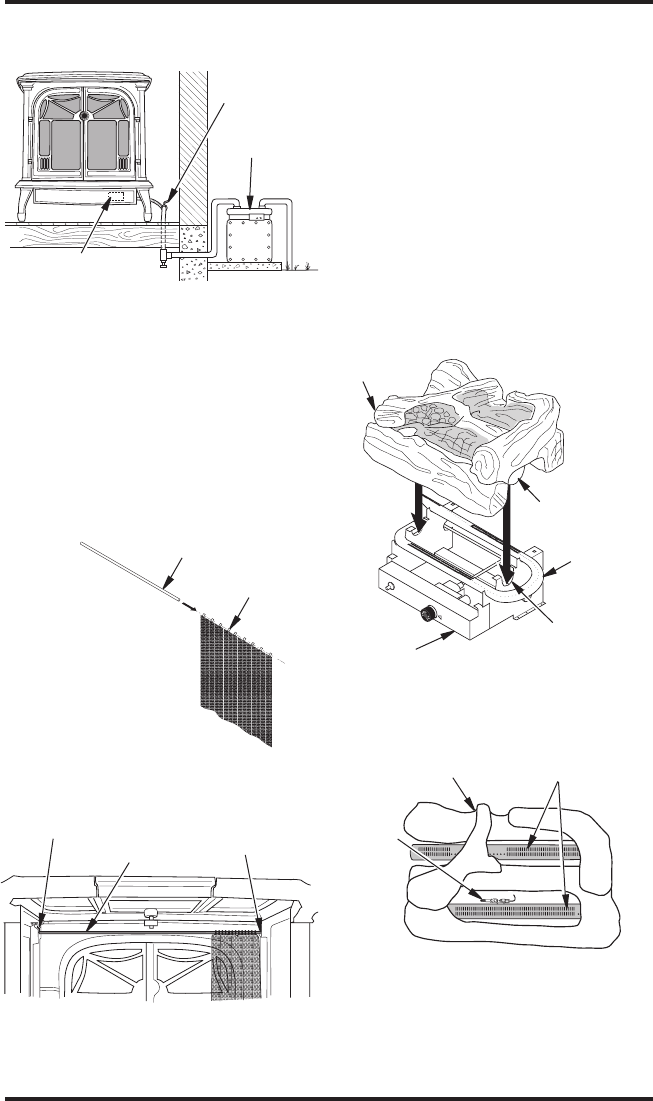
Figure 11 - Checking Gas Joints on
Natural Gas Unit
Gas Meter
Equipment
Shutoff Valve
Control Valve
Location
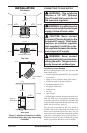
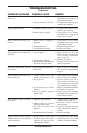
INSTALLING ROD AND SCREEN
1. Insert rod through small rings located at top
of screen (see Figure 12).
2. From back of stove, insert rod into hole
located inside right front of stove as shown
in Figure 13.
3. Slip left side of rod down into slot on inside
left front of stove (see Figure 13).
Figure 12 - Assembling Rod and Screen
Slot on Inside
Left Front of
Stove
Rod
Figure 13 - Installing Screen Into Stove
(View From Back of Stove)
Rings
Hole on Inside
Right Front of
Stove
Rod with
Screen
Assembled
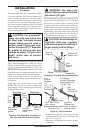
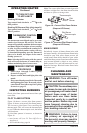
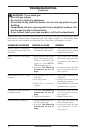
INSTALLING LOG SET
1. Set one-piece log on heater base as shown in
Figure 14. Make sure middle section at bot
-
tom of log is seated into "U" shaped cutout in
center of heater base. Log will fit securely on
base. IMPORTANT: Make sure log does not
cover any burner ports and does not touch the
stove cavity (see Figure 14).
2. Fasten back panel to stove with four (4) bolts
and washers removed in step 4 of Unpacking,
page 7. Make sure product identification label is
located on the outside lower left-hand corner.
3. Place freestanding stove in desired position
being careful not to damage gas connections.
Be sure to maintain clearances to combustibles
and wall clearances as outlined on page 8.
Figure 14 - Installing One-Piece Stove
Log Set
One-Piece
Log Set
Heater
Base
"U" Shaped
Cutout in
Chassis
Burner
Middle Section
at Bottom of
Log Set
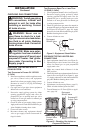
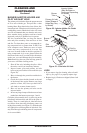
Burner Porting Areas
(double slotted
rectangular openings
Figure 15 - Top View of One-Piece Log
Set on Gas Log Heater
Safety
Pilot
Location
One-Piece
Log Set