DQ-1000/1100/1200
BEFORE USING THE UNIT FOR THE FIRST TIME…
1.Remove the battery compartment cover on the
back of the unit.
2.Remove the insulating paper from between the
batteries and contacts.
3.Replace the battery compartment cover.
4.Press reset button.
5.Set the time.
GENERAL GUIDE
• The configuration of your clock may differ somewhat from that shown in the
illustration.
• The display illuminates for a few seconds whenever you press the Snooze/
Light button.
• The Snooze/Light button 1 of the DQ-1200 employs a
“ touch sensor,” so all you need do is touch it to turn on the light or stop the
alarm.
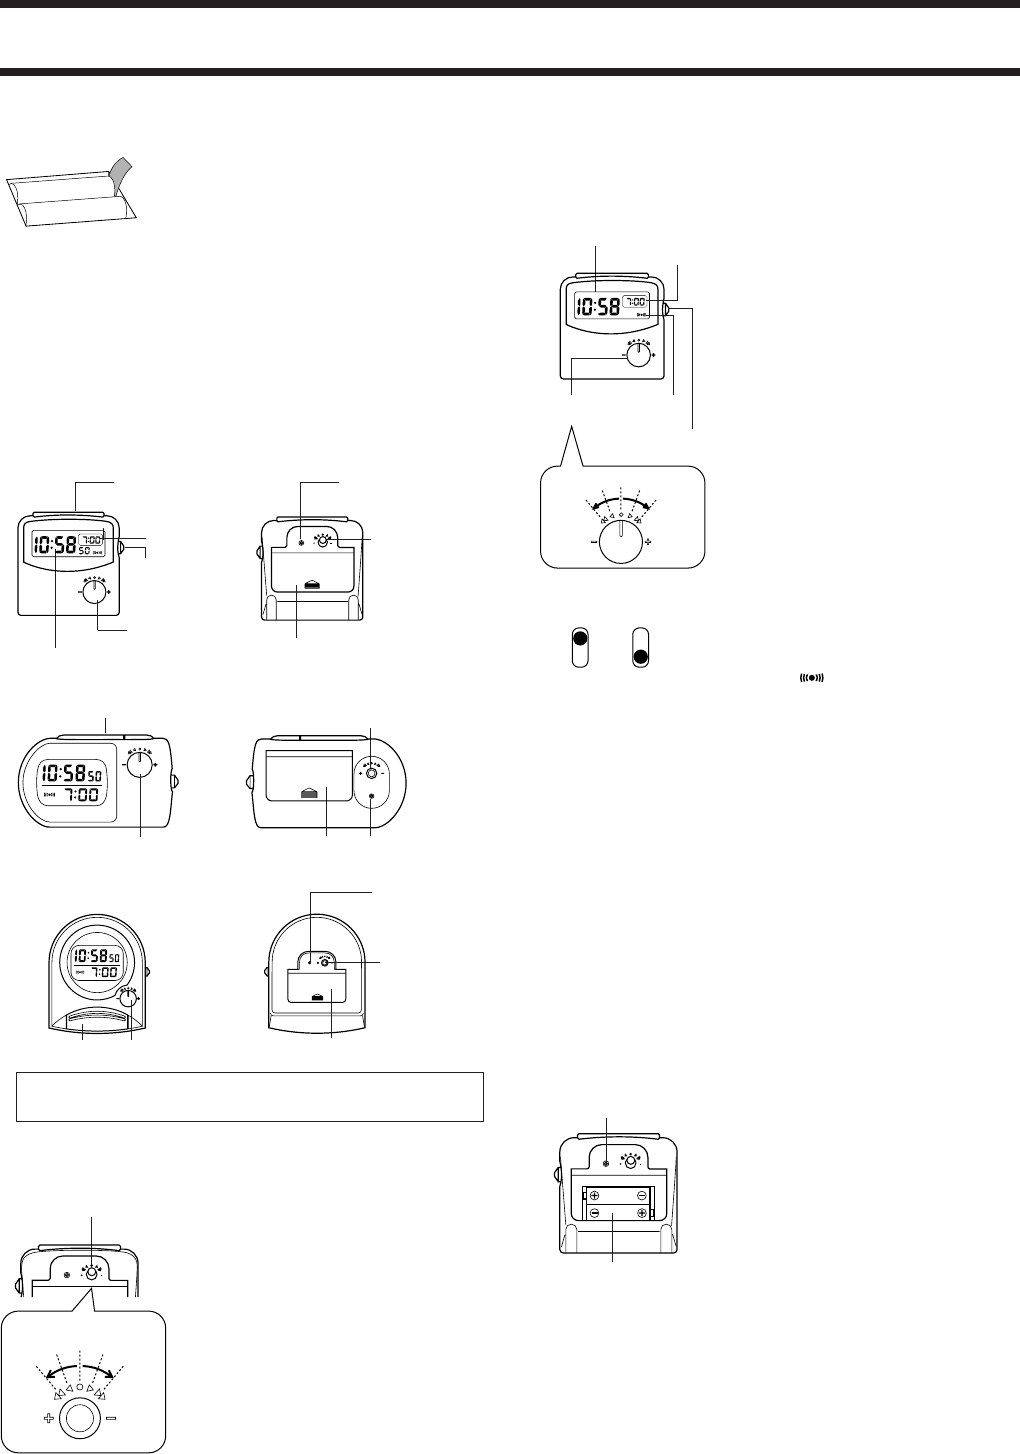
DQ-1000
Snooze/Light
button
1
PM
AM
ALARM
SET
2
Alarm On/
Off switch
Alarm
setting dial
3
Alarm time
Time
setting
dial
RESET
TIMESET
Reset
button
4
Battery compartment cover
6
5
Current time
DQ-1100
ALARM
SET
AM
PM
3
2
1
DQ-1200
ALARM
SET
AM
PM
1
3
2
The operational procedures for DQ-1000, DQ-1100 and DQ-1200 are
identical. All of the illustrations in this manual show DQ-1000.
4
6
TIME SET
RESET
TIME SET
RESET
4
5
6
SETTING THE TIME
Rotate the time setting dial to the left to increase
the number(s). Rotate the dial to the right to
decrease the number(s). Rotating the dial left or
right as far as it goes causes the setting to jump
on 10-minute steps.
• The time setting is changed minute-by-
minute.The hour setting is changed automati-
cally whenever a change in the minutes in-
creases past 59 minutes or decreases past 00
minutes.
• The seconds are reset to “00” whenever you
change the minutes setting.
• The time display uses a 12-hour format, so
morning is indicated by “AM” and evening is
indicated by “PM”.
[Back]
Time setting dial
RESET
TIMESET
Increase Decrease
USING THE ALARM
The alarm of this clock features a Snooze Function, which lets you catch a few
more minutes sleep. For full details on how to use this function, see “To use
the alarm”.
To set the alarm
Rotate the alarm setting dial to the right to increase
the alarm time by one minute, or to the left to
decrease the alarm time by one minute. Rotating
the dial left or right as far as it goes causes the
setting to jump in 10-minute steps.
• The hour setting changes automatically
whenever a change in the minutes increases
past 59 minutes or decreases past 00 minutes.
• The time display uses a 12-hour format, so
morning is indicated by “AM” and evening is
indicated by “PM”.
Snooze/Light
button
Alarm time
PM
AM
ALARM
SET
Alarm
setting dial
Alarm on
indicator
Alarm On/Off
switch
Increase
Decrease
ALARM
SET
To switch the alarm on and off
Slide the Alarm On/Off switch to the ON position
to switch the alarm on, or to the OFF position to
switch it off.
• When you switch the alarm on, the alarm on
indicator “
” appears on the display.
To use the alarm
1.Set the alarm time and switch the alarm on.
2.When the alarm time you set is reached, the alarm starts to sound. It
continues for about one minute or until you stop it by pressing the Snooze/
Light button.
• When the alarm starts to sound, the alarm on indicator flashes on the display.
This indicates that the Snooze function is activated.
3. About four minutes after you press the Snooze/Light button, the alarm starts
to sound again.
4.The above repeats up to seven times, or until you switch the alarm off (by
sliding the Alarm on/off switch to the OFF position).
• You can stop the repeating alarm at any time by sliding the Alarm on/off
switch to the OFF position.
• The beep pattern of the alarm changes (becomes faster) as the alarm
sounds. The pattern changes up to five times.
On Off
BATTERY REPLACEMENT
Replace the batteries whenever the display of the clock becomes dim and
difficult to read, or when the display light fails.
1.Open the battery compartment cover on the
back of the clock by sliding it in the direction
indicated by the arrow on the cover.
2.Remove the two old batteries.
3.Load two new batteries, making sure that their
positive (+) and negative (-) ends are facing in
the correct directions.
4.Replace the battery compartment cover.
5.Press reset button to reset the digital display
information.
6.Set the time.
[Back]
RESET
TIMESET
Reset button
Battery
compartment
5


