


Operation Guide 1174
2
6. After you set the correct manufacturer code, press A to return to the mode you
selected in step 2 (TV or Video).
• See “To use the TV and video remote control functions” for information on using the
remote control functions.
• If you can’t find a code that works with your equipment, see “How to find the right
code”.
• If you do not press any buttons for a few minutes while the manufacturer code is
flashing, the flashing will stop and the watch automatically returns to the TV or Video
Mode.
How to find the right code
Use the following operation if you have difficulty finding a manufacturer code that
works with your equipment.
1. Switch on the TV or video tape deck whose manufacturer code you want to set.
2. In the Timekeeping Mode, press B to select the TV Mode (
TV
) or Video Mode
(
).
• Select TV Mode if you want to find the code for your TV, or the Video Mode to find
the code for your video deck.
3. Hold down A until a manufacturer code appears flashing on the display.
4. Press K until manufacturer code 01 appears.
• Code 01 comes sequentially after code 42.
• Holding down K increases the code number at high speed.
5. To test whether or not the displayed manufacturer code is correct for your
equipment, point the Signal Emitter (red window) at your TV or tape deck and press
D.
• If the above operation switches the power of your TV or tape deck off, it means that
the correct code has been selected. Skip to step 6.
• Certain TVs and tape decks may be slow to respond after receiving a remote control
signal. With such units, try holding down D for one or two seconds.
• If nothing happens when you press D, press K to advance to the next code and
repeat step 5 to test the code.
6. After you set the correct manufacturer code, press A to return to the mode you
selected in step 2 (TV or Video).
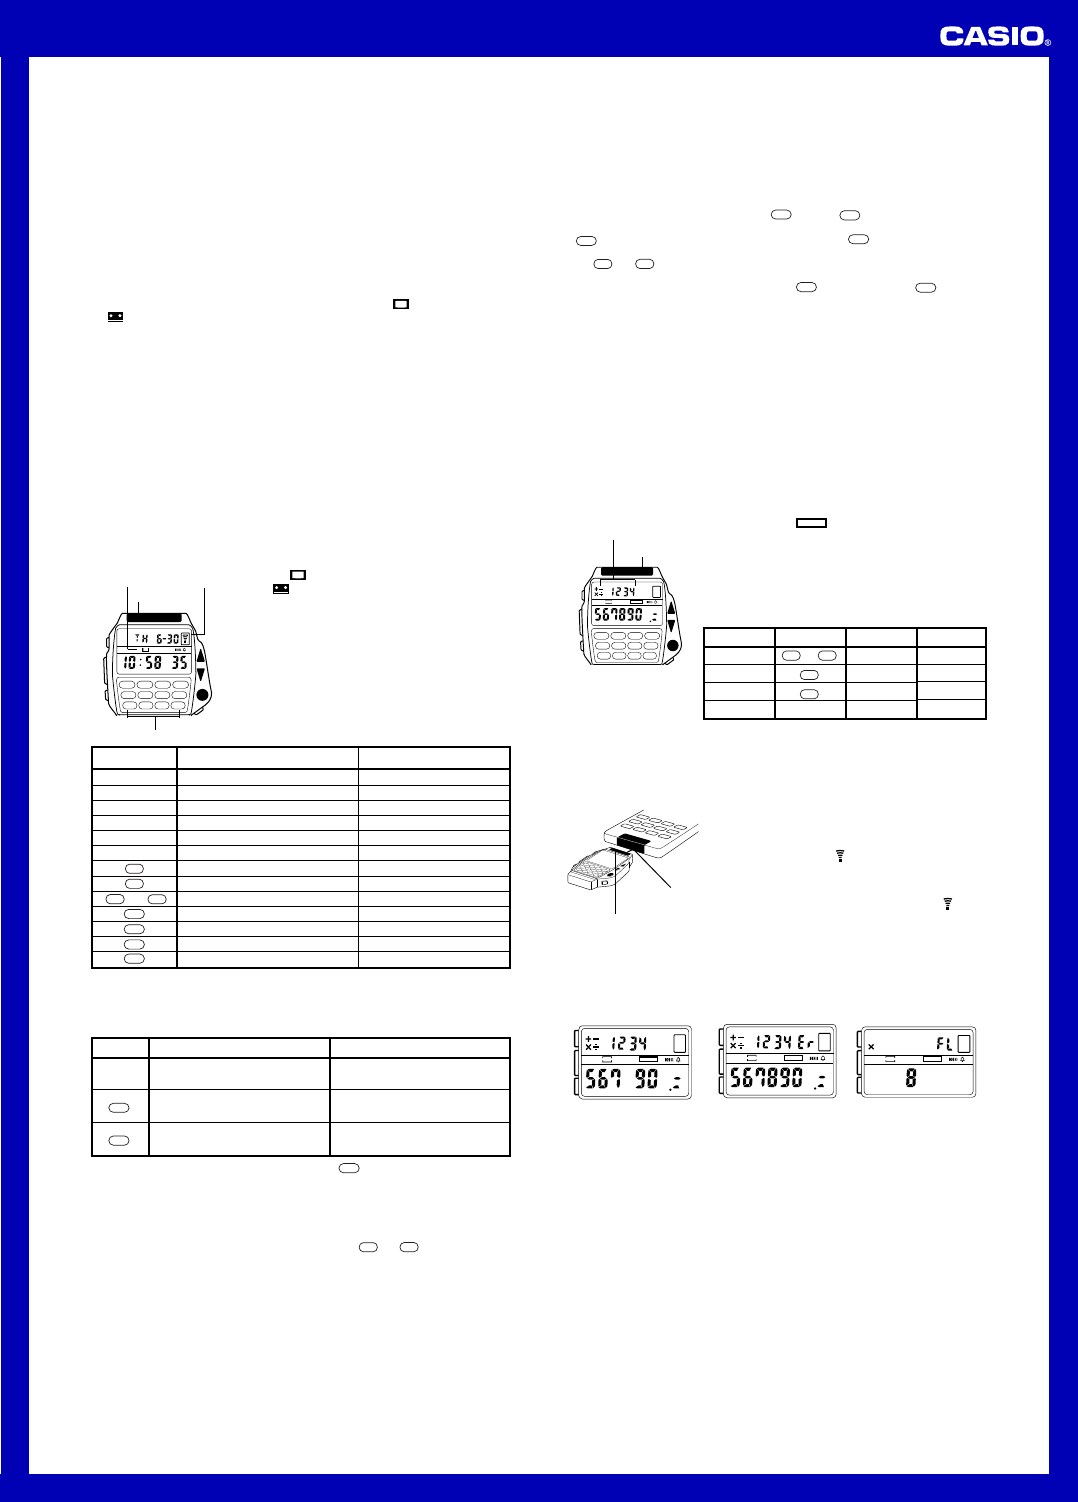
To use the TV and video remote control functions
1.In the Timekeeping Mode, press B to select either the
TV Mode (
TV
indicator shown on the display) or Video
Mode (
indicator shown on the display).
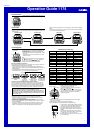
2.Point the Signal Emitter (red window) at your TV or tape
deck and use the buttons to perform the operation that
you want (see table on the right).
• Each time you perform an operation, an indicator
appears on the display to indicate when the watch is
emitting a remote control signal.
78
90
4
56
•
123
=
TV
P
Indicator
Signal Emitter
TV mode
indicator
A
C
B
D
Numeric Buttons
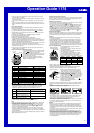
TV Mode
Switches to Video Mode
Switches power on and off
Increases volume
Decreases volume
Performs execute or confirm function
Changes to the next higher channel
Changes to the next lower channel
For channel selection
Inputs 1 for channel selection
Inputs 2 for channel selection
Inputs 3 for channel selection
Inputs 4 for channel selection
Button
B
D
K
L
●
Numeric Buttons
to
Video Mode
Switches to Learning Mode
Switches power on and off
Increases volume
Decreases volume
No function
Changes to the next higher channel
Changes to the next lower channel
1, 2, 3, 4 have functions noted below
Starts rewind operation
Stops tape transport
Starts tape playback
Starts fast forward operation
0
=
•
9
1
2
3
4
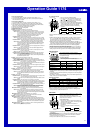
After pressing A, the buttons in the following table have the functions noted.
• When you press A, the indicator “S” appears in the upper left of the display to
indicate that the buttons are “shifted.” Note that the manufacturer code setting
display does not appear if you press A while “S” is displayed. To call up the
manufacturer code setting display, first press another button to clear “S.”
TV Mode Video ModeButton
Switches between TV and video
function
Inputs “1” as leading digit of two
digit channel number
*
(10 +)
Inputs “2” as leading digit of two
digit channel number (20 +)
Switches between TV and video
function
No function
No function
●
1
2
*
With some TV models, pressing A and then the
1
button causes a switch
between one-digit channel input (−) and two-digit channel input (– –).
Inputting two-digit channel numbers
There are various systems being used for input of two-digit channel numbers. With this
watch, you should use the system that is closest to the one employed by the remote
control unit that comes with your TV or video equipment.
Example: To select channel 12
• If the remote control unit of your equipment has a special key for input of a 10’s digit,
press the watch’s A button. Next, input and then .
• If the remote control unit of your equipment allows input of two digits, hold down the
1
button for two or three seconds and then, press the button of the watch.
• If the remote control unit of your equipment does not allow input of two digits, use
the and buttons to change to the two-digit channel number you want.
• If the remote control unit of your equipment uses an EXECUTE or CONFIRM button
for two-digit channel number input, press the button and then the button,
and then press the
●
button of this watch.
=
•
2
1
2
2
1
About the Learning Mode
The Learning Mode makes it possible for you to set up the watch for use with a stereo
system, or any other device equipped with an infrared sensor. The Learning Mode lets
you store infrared data for up to 16 functions for instant recall when you need them.
Important!
• Due to difference in infrared signal forms, this watch may not work properly with
certain types of equipment.
• Learning Mode functions may not work properly if watch battery power is too low.
• Replacing the battery will cause the Learning Mode data settings to be cleared. If
you want to assign functions to the same buttons after the battery is replaced, be
sure that you make a record of your data before you have the battery replaced.
• The Learning Mode data for some functions take up more memory than that of other
functions. Because of this, you may be able to store data for fewer than 16 functions.
78
90
4
56
•
123
=
SET
LEARN
To store Learning Mode data
1.In the Timekeeping Mode, press B to select the
Learning Mode (
LEARN
).
2.Hold down A for one or two seconds, until the data
memory display appears.
• The markings of all the buttons that are available for
data storage appear on the display.
• If you do not perform any operation for two or three
minutes while the data memory display is shown, the
watch automatically returns to the Learning Mode.
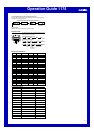
3.
Press a button to select where the data should be stored.
Markings of buttons
available for storage
Signal Emitter
A
C
B
Markings
0 to 9
•
&
!
Markings
@
#
$
Buttons
0
to
9
•
=
K
Buttons
L
●
D
[Data Memory Display]
D
• When you press a button, the corresponding marking flashes on the display,
indicating that the watch is ready to accept data input.
• If you do not perform any operation for about 15 seconds after a marking starts
flashing, the watch automatically returns to the Data Memory Display.
4.Position the signal emitter of the remote control unit
whose function you want to store against the signal
emitter of the watch, as shown in the illustration, and
hold down the button of the remote control unit for the
function whose data you want to store.
• At this time, the indicator
appears in the upper part of
the watch’s display to indicate that the watch is receiving
the signal. Take care that you do not move the watch or
the remote control unit, and that you keep the remote
control unit button depressed until the indicator
disappears from the watch’s display.
• While the watch is storing infrared data, “– –” is shown in
the watch’s upper display.
Signal Emitter
About 3 cm
Remote Control Unit
• The watch can receive Learning Mode data only as long as one of the key markings
is flashing on the display. If the key marking you selected stops flashing, return to
step 3.
• After the data storage procedure is complete, the corresponding key marking
disappears from the display of the watch (Figure 1).
SET
LEARN
Figure 1 Figure 2 Figure 3
• The message “Er” (error) on the watch’s display (Figure 2) indicates that the data
was not received correctly or that infrared data was not stored correctly in the
watch’s memory. Repeat the procedure starting from step 3.
SET
LEARN
SET
LEARN
• The message “FL” (full) on the watch’s display (Figure 3) indicates that further data
storage will not be possible because memory is full.
5. If you want to store more data, continue from step 3. To exit the procedure, press
A to return to the Learning Mode.
Important
• Whenever you store Learning Mode data, it replaces anything that was previously
stored in the memory you select. If you want to change previously stored data to
different data, perform the above procedure and press the button whose data you
want to replace in step 4. When you do, the marking for that button will start to flash
on the display.
• If an “Er” or “FL” error occurs while you are replacing existing data with new data, the
previous data remains unchanged in memory.
•
Sometimes, the watch will indicate that data was successfully stored, but you may
have problems when later using the function in the Learning Mode. When this
happens, repeat the above procedure and try storing the Learning Mode data again. If
the function still does not work properly in the Learning Mode, it probably means that
the signal you are storing is not compatible with this watch’s remote control system.
• You can keep a record of what functions you store to which button using the
Learning Mode Memo.
Notes
• With some television models, pressing D will not switch power on. If this happens,
try pressing any of the numeric buttons to switch power on.
• With some television models, pressing A and then
●
will not switch between TV
and video functions. If this happens, try pressing the and buttons. With
some TVs, the switch between the TV and video functions is performed between
channel 1 and the last channel available.
• This watch is equipped with buttons that cover as wide a range of remote control
functions as possible. Note, however, that if your TV or tape deck is not equipped
with some of these functions, nothing will happen when you press the corresponding
button on this watch.
• For televisions that do not have a TV/video switching function, pressing A and then
●
may switch teletext, etc. on and off.
=
•