Te chnic a l
Letter
BOOK NO. 494 SERIES 6P29
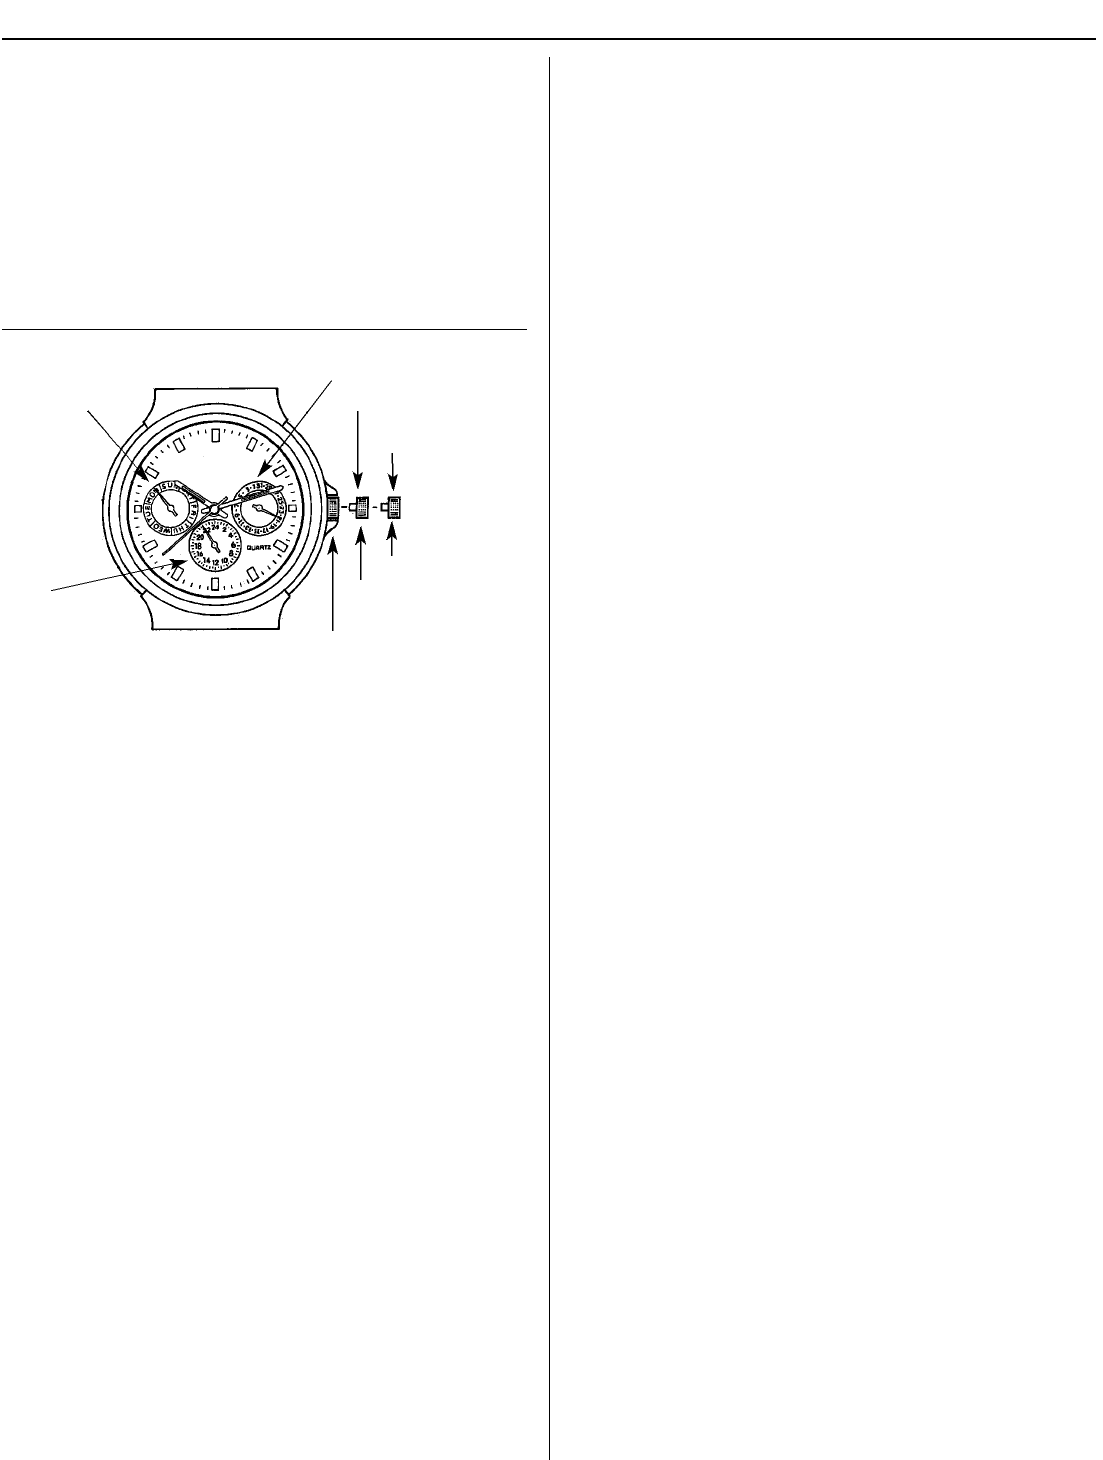
The ab o ve diagram will simplify fo l l owing the step-by-step setting instru c t i o n s .
M a t ch it to the face of your new Bulova quartz wa t ch . Note that the DAY dial is
at 9 o’clock,the DATE dial is at 3 o’clock,and the 24-HOUR dial is at 6 o’clock.
The watch CROWN has three specific p o s i t i o n s . You will hear a “ cl i ck ”w h e n
the crown is pulled out (or pushed back) from one position to another. Once the
wa t ch is set pro p e r ly, except for date variations or time zone changes,adjustment
is rarely, if ever, required.
SETTING THE TIME
Step 1. When the second hand reaches 12 o’clock (the zero or 60th second
mark),pull the crown all the way to the “OUT”position (you will hear two
“clicks”). All hands will stop.
Step 2.Tu r n the crown to move hands FORWARD (cl o ckwise) until the day i n d i c a t o r
jumps to the center of the day desired (SUN, M O N, e t c . ) . This establishes mid-
n i g h t , the b e ginning of the day.
Step 3. For A.M.time,continue to move hands forward until the m i nute hand is
a p p r ox i m a t e ly 5 minutes beyond the desired minute m a r ke r ;t h e n ,ge n t ly turn back
to the same marke r. For P. M .t i m e , fo l l ow the same procedure,but first advance
the hands past 12 o’clock.
N O TE:The date will advance automatically at midnight,p rovided that A . M . and P.M.
have been established (Steps 2 and 3). The watch calendar is p ro grammed for a
3 1 - d a y cycl e . T h e re fo re ,on the fi rst day of any month fo l l owing a month with
fewer than 31 day s ,t h e date must be advanced m a nu a l ly (see Step 5).
Step 4.When the time standard by which you are setting your wa t ch (e.g.,t e l e p h o n e
beep) re a ches the 60th second,push the crown all the way to the “ I N ”p o s i t i o n . A l l
hands will start instantly.
SETTING THE DAT E
Step 5. To set the date,pull the crown to the “INTERMEDIATE”position (one
“ cl i ck ” ) . Tu rn crown slow ly to advance the date indicator to the desired date.
N OT E :The date should never be ch a n ged manu a l ly between 9:00 P. M .and 3:00 A . M .
as this might affect the calendar mechanism and the a c c u racy of the date. ( T h e
m e c hanism will not be damaged if the c rown is turned accidentally during this
time peri o d ,h oweve r. )
Step 6. Push the crown to the “ I N ”p o s i t i o n . Your wa t ch is now operating norm a l ly.
24-HOUR TIMING
The 24-hour dial will be synch ronized with the regular time,p rovided that midnight
has been established (Steps 2 and 3).
It’s Bulova Watch Time Watch Setting Guide
DAT E
DAY
C R OW N
OUT POSITION
IN POSITION
INTERMEDIATE
POSITION
DATE CORRECTION
TIME CORRECTION
DAY CORRECTION
2 4 - H O U R
D I A L


