Start Here
EPSON Perfection
®
3170 Photo
Unpack Your Scanner
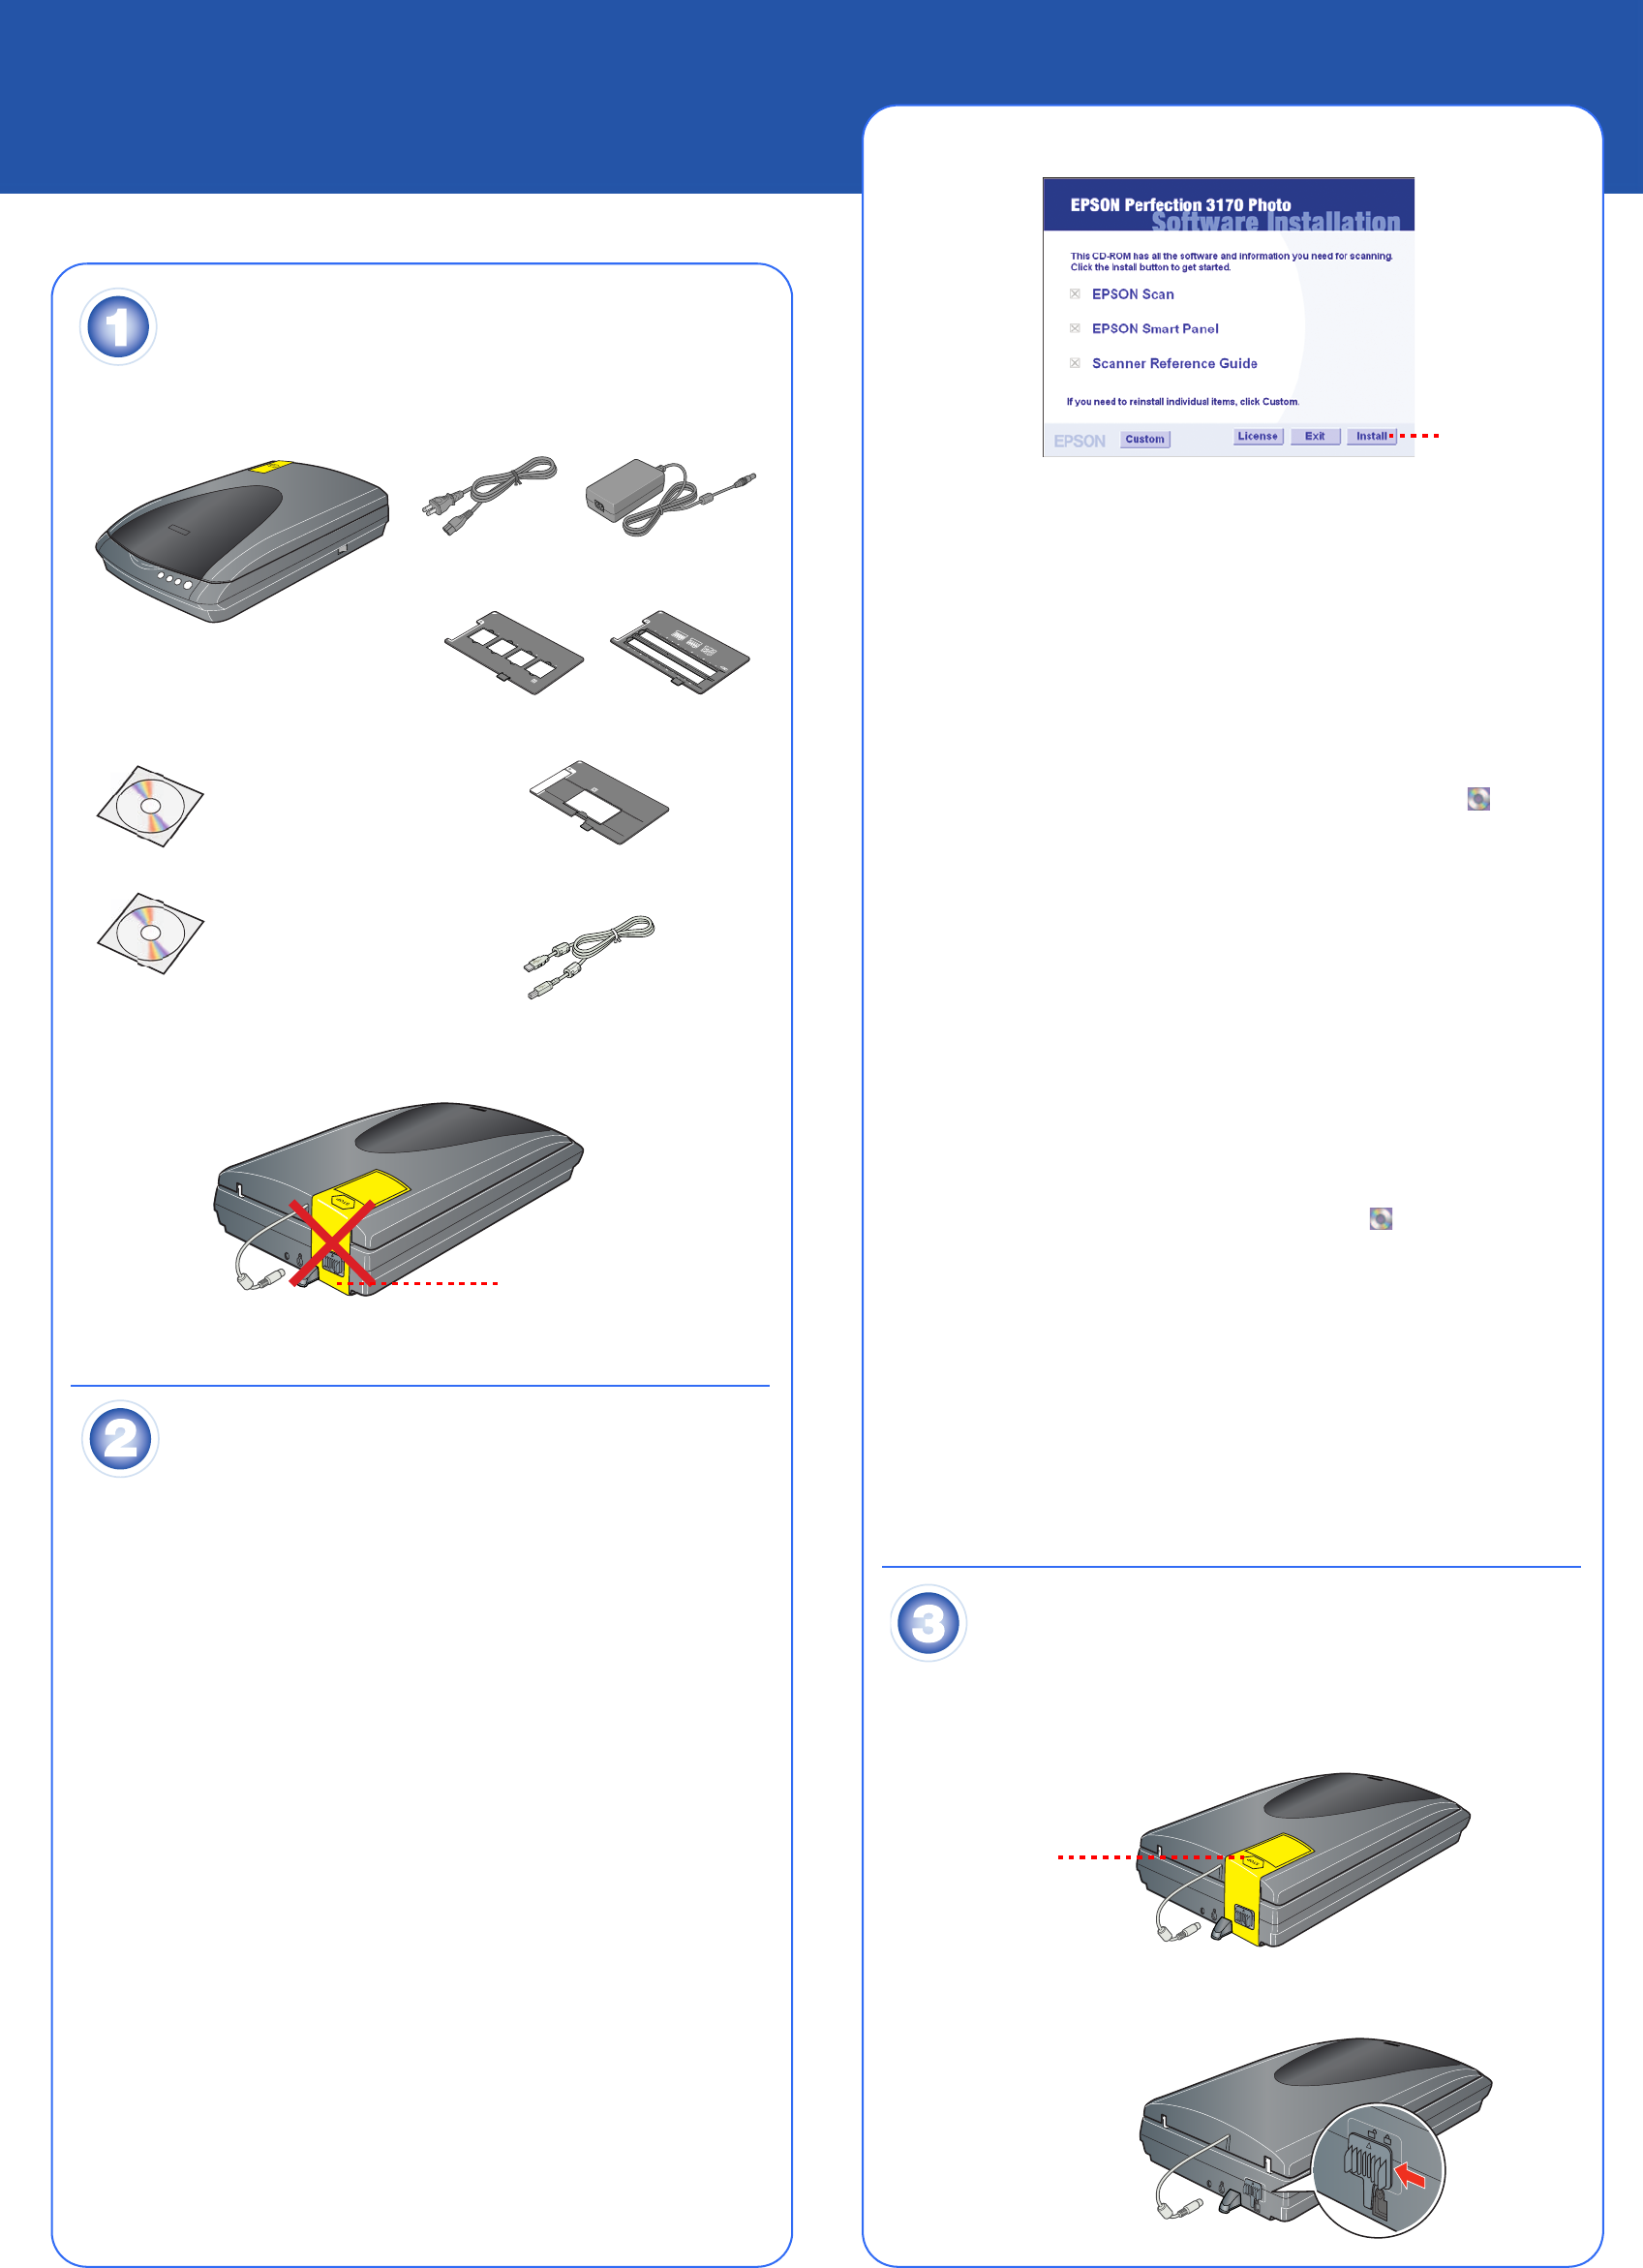
1 Make sure you have all the accessories shown below for your EPSON
®
scanner:
2 Remove all the packing tape, but leave the large sticker in place until you are
instructed to remove it.
Install the Software
Wait! You must install your software before connecting the scanner to
your computer. The installation process may take several minutes. Be sure
to close all open programs and turn off any virus protection programs.
If you don’t already have Adobe Photoshop or Photoshop Elements on your
computer, install Photoshop Elements from the CD-ROM included with your
scanner.
Note: The software works with Windows
®
98, Me, 2000, and XP, and Macintosh
®
OS 8.6 to 9.x and OS X 10.2.x. Follow the steps below (for Windows), or the
steps in the next column (for Macintosh).
Windows
1 Insert the scanner software CD-ROM in the CD-ROM or DVD drive. The
installer starts automatically. If it doesn’t start, do the following:
• Windows XP: Click Start, click My Computer, then double-click EPSON.
• Windows 98, Me, and 2000: Double-click My Computer, then double-
click EPSON.
2 When you see the message about disabling your antivirus software, click
Continue.
3 Read the license agreement, then click Agree.
4 At the Software Installation screen, click Install.
5 Follow the on-screen instructions to install each program, including ABBYY
®
FineReader
®
and Presto! BizCard. Note that EPSON Smart Panel
™
installs in
several steps.
6 At the end of the installation, click Exit.
7 When you see the Product Registration screen, register your scanner as
instructed. At the last screen, click Done or close your browser.
Macintosh
1 Insert the scanner software CD-ROM in the CD-ROM or DVD drive. The
installer starts automatically. If it doesn’t start, double-click the EPSON
CD-ROM icon.
2 If you are using Mac OS X, double-click the Mac OS X folder in the EPSON
folder, then double-click the EPSON icon.
If you are using Mac OS 8.6 to 9.x, double-click the EPSON icon in the
EPSON folder.
3 When you see the message about disabling your antivirus software, click
Continue.
4 If you see a license agreement, click Agree to continue.
5 At the Software Installation screen, click Install. Enter your Administrator
name and password if necessary.
Note: If you’re installing on Macintosh OS 8.6 to 9.x, you may see a prompt
to update your Carbon Library. After the CarbonLib installation is complete
and you’ve restarted your system, double-click the EPSON icon, then
click Install to continue the installation.
6 Follow the on-screen instructions to install each program, including ABBYY
FineReader and Presto! BizCard. Click Quit to continue, as needed. Note
that EPSON Smart Panel installs in several steps.
7 At the end of the installation, click Exit.
8 If you see a Product Registration screen, register your scanner as instructed.
At the last screen, click Done or close your browser.
9 Follow the instructions below to connect the scanner. Then restart your
system to fully activate the scanner and software.
Connect the Scanner
After your software is installed, it’s time to get connected.
1 Remove the sticker from the back of the scanner.
2 Locate the transportation lock on the back of the scanner and slide the lock
to the left, as shown below.
3 Connect the cable for the built-in film adapter.
4 Connect the power cord and AC adapter, as shown.
5 Connect the AC adapter to the scanner.
6 Plug the other end of the power cord into a grounded electrical outlet.
Caution: It is not possible to change the AC adapter’s input or output
voltage. If the label on the AC adapter does not show the correct voltage,
contact your dealer. Do not plug in the power cord.
7 Use the USB cable that came with your scanner. Plug the square end of the
USB cable into the scanner’s USB port. Then plug the flat end into any
available USB port on your computer or hub.
Note: Your scanner may not work correctly if you use a USB cable other than
the one supplied by EPSON or if you connect your scanner through more
than one hub.
8 Turn on the power switch on the side of the scanner.
The scanner turns on and the ] Start button flashes green. It stops flashing
and stays green when the scanner is ready.
9 For Macintosh, restart your system to fully activate the scanner and
software.
Scanner Basics
Your First Scan
The ] Start button on your scanner automatically opens the EPSON Smart
Panel, making it easy for you to scan your images for many different uses. Here’s
how you can use the ] Start button and Smart Panel to scan photos and save
them as files.
1 Raise the scanner cover and place your
photo face down on the glass. Make
sure the top right corner of the photo
is aligned with the top right corner
of the scanner.
Then close the cover.
2 Press the ] Start button on your scanner.
Note: In Windows XP, you will see a message the first time you press the
] Start button. Select EPSON Smart Panel, click Always use this
program for this action, then click OK.
EPSON Smart Panel opens on your computer.
3 Click the Scan and Save icon.
A progress meter appears on the screen and your photo is automatically
scanned. After your photo is scanned, the View Image screen opens.
4 Click Next to continue.
5 When you see the following screen, select a location and file type for your
scanned image, then click Save.
Perfection 3170 Photo scanner
(cover includes film adapter)
CD-ROM with
EPSON Scan driver,
software, and
electronic manuals
USB cable
35 mm slide holder
Power cord and AC adapter
Adobe
®
Photoshop
®
Elements 2.0 CD-ROM
Medium format (120/220)
transparency holder
35 mm film and
negative holder
IMPORTANT!
Leave the sticker in place until
you are instructed to remove it
Click Install
Remove sticker
AC adapter
Power cord
Select a file format
pec
y t
e pat
to
the folder where you
want to save your
scanned image
Click Save
4043664-00
Turn over
Tarragon-EAI.FM Page 1 Tuesday, July 22, 2003 11:09 AM


